
Import an Existing Platform into Temps
Temps has a built-in import wizard that connects to a running Coolify, Dokploy, CapRover, Portainer, Kubernetes, or Kamal instance, discovers what's actually deployed there, and recreates it as a real Temps project — services, environment variables, and a live deployment included. No manual reconfiguration, no rewriting Dockerfiles by hand.
Supported platforms
| Platform | What Temps discovers | Guide |
|---|---|---|
| Coolify | Applications, one-click databases | Migrate from Coolify |
| Dokploy | Applications, databases | Migrate from Dokploy |
| CapRover | Apps, one-click databases | Migrate from CapRover |
| Portainer | Containers and Compose stacks | Migrate from Portainer |
| Kubernetes | Deployments, StatefulSets, CronJobs | Migrate from Kubernetes |
| Kamal | Services declared in config/deploy.yml | Migrate from Kamal |
Each guide covers the credentials that specific platform needs and anything worth knowing before you run the import.
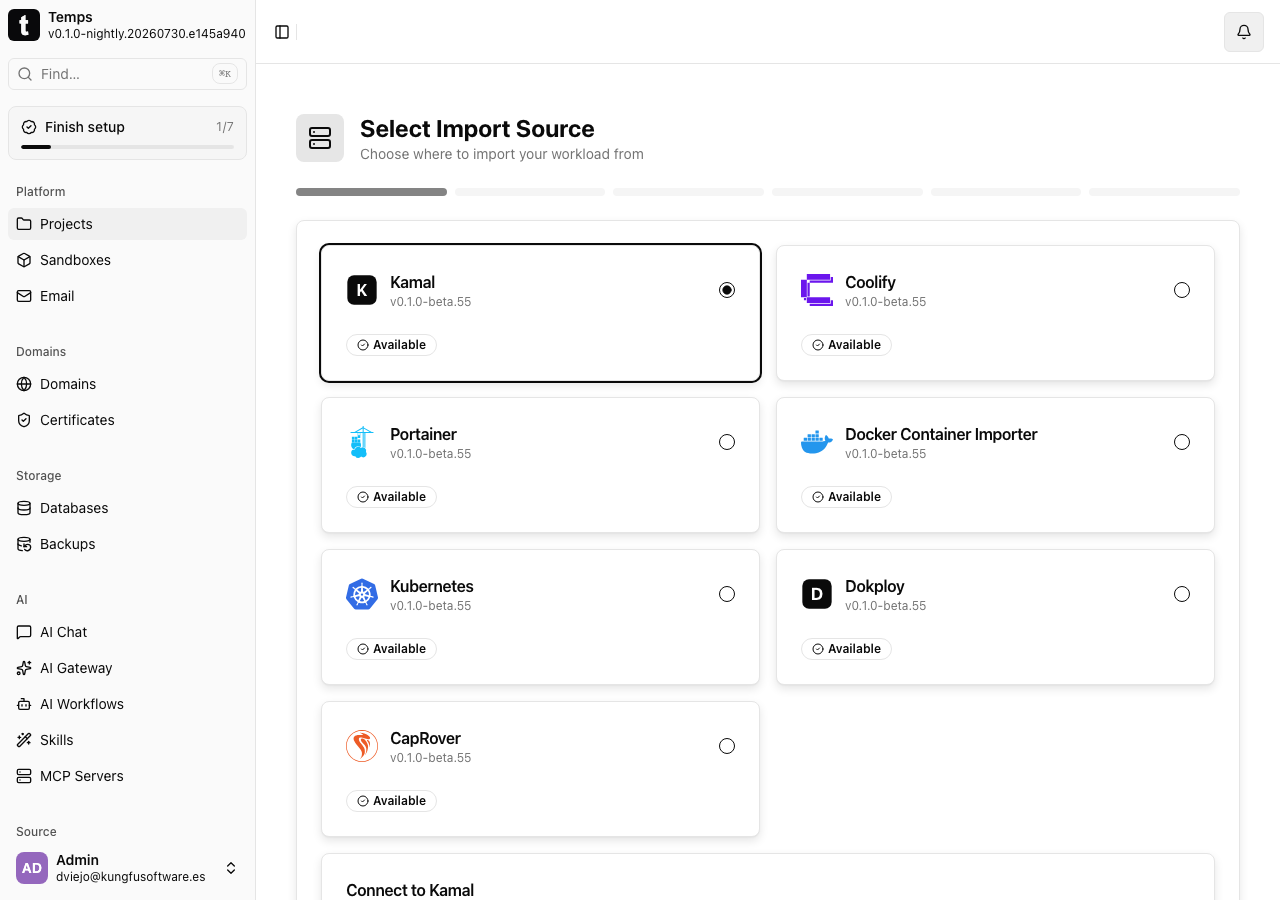
How the import wizard works
The same flow runs for every platform above, in Projects → Import:
- Connect — pick the source platform and provide credentials (an API token, an admin password, a kubeconfig, or a pasted
deploy.yml— the credential type depends on the platform; see the per-platform guides). - Discover — Temps queries the source instance directly and lists what's actually running: apps, databases, containers.
- Review the plan — pick the workload to import and Temps shows exactly what it will create: the project, its environment, any managed services, environment variables (secrets masked), and domains. Nothing is created yet at this step.
- Execute — Temps creates the project and its services, copies environment variables, imports data into managed services where the source database is reachable, and deploys the application for real.
- Verify — Temps checks the deployment reaches a healthy state and the app actually answers over HTTP before calling the import done. If something needs attention, the wizard says exactly what and where to look.
See what would be imported, without creating anything
- 1
Go to Projects, then click Import.
- 2
Select the source platform and enter its credentials.
- 3
Click Discover Workloads, pick the one to import, and review the plan — nothing is created until you click Execute Import.
Linking a Temps-tracked Git repository during the import is optional — the wizard's own discovery already picks up the workload's git source (if any) independently, so image-only workloads and public repositories both import fine without one.
Before you start
- Keep the source platform running until you've verified the imported app on Temps — the import reads from it, it doesn't touch or shut it down.
- Have the source instance's admin credentials ready (see the platform-specific guide for exactly which ones).
- If the workload has a database, note whether the source database is reachable from the server running Temps — that determines whether its data copies automatically or needs a manual
pg_dump/pg_restore(see below).
What moves automatically
| Moves automatically | Needs a manual step |
|---|---|
| The project, its environment, and build configuration | DNS cutover to the new domain |
| Environment variables (secrets included) | Database data, when the source database isn't reachable from the Temps server |
| Databases created as managed Temps services | Anything platform-specific the source doesn't expose through its own API (e.g. custom nginx config on the source host) |
| Domains discovered from the source, when not already registered elsewhere | |
| The deployment itself — a real build (git-backed platforms) or a real image pull and container start (image-based platforms) |
When a domain the wizard discovers is already registered on another Temps project or environment, that one step is skipped with a clear message instead of failing the whole import — add it manually once you're ready to cut over.
After the import
The imported project deploys to a Temps-provided address immediately, so you can verify it while the source platform keeps serving production traffic.
Move the production domain
- 1
Open the project, go to Settings, then Domains, and click Add Domain.
- 2
Enter app.yourdomain.com and copy the DNS record shown by Temps.
- 3
Update the record at your DNS provider without deleting the application on the old platform.
Checkpoint: Confirm the domain resolves to the Temps server, TLS is active, and the app behaves as expected under real traffic.
Keep the source platform and its backups available until you've observed normal production traffic on Temps and DNS caches have expired. Then revoke the credentials you used for the import and decommission the old deployment.
Platform not listed here?
The import wizard covers the six platforms above. For anything else — Easypanel, a hand-rolled Compose stack, or a platform Temps doesn't discover yet — you recreate the deployment by hand: connect the same Git repository, copy over the build settings and environment variables, recreate any databases as managed services, and verify the new deployment before cutting DNS over. The Vercel, Netlify, Heroku, Railway, Render, and Fly.io guides walk through that manual path for those specific platforms — the same approach applies to any platform not covered by the automated wizard.